Creating a paver walkway can transform your outdoor space, providing both aesthetic appeal and functional pathways. However, the longevity and stability of a paver walkway largely depend on the quality of the base preparation. A well-prepared base ensures that the pavers remain level and secure for years to come, preventing issues such as shifting, sinking, and weed growth. In this blog post, Liberty Heritage Nursery Farm helps about the necessary steps and considerations for preparing the base for a paver walkway, ensuring a successful and durable installation.
Planning and Design
Before breaking ground, thorough planning and design are crucial. Start by sketching out the desired layout of your walkway, including any curves or intricate patterns. Consider the width of the walkway, which typically ranges from 3 to 4 feet for pedestrian paths. Measure the area accurately and mark the boundaries using stakes and string or spray paint. This initial planning phase helps you visualize the final outcome and calculate the amount of materials needed.
Planning and design are the bedrock of any successful landscaping project. From conceptualization to execution, meticulous planning ensures the realization of a client’s vision. Our landscaping service integrates innovative design concepts with practical planning techniques, tailored to meet individual needs. Whether it’s crafting a serene backyard oasis or revitalizing commercial spaces, our expertise ensures every detail is considered. With a keen eye for aesthetics and functionality, we transform landscapes into captivating environments that endure. Explore our planning and design services to embark on your landscaping journey.
Soil Assessment and Excavation
The first physical step in base preparation is assessing the soil. Different soil types (clay, sand, loam) have different drainage and stability characteristics. Conduct a soil test to determine its composition and drainage capabilities. Based on the results, you might need to improve drainage or reinforce the soil. Once the soil is assessed, excavation can begin. Excavate to a depth that accommodates the paver thickness, the bedding sand, and the base material, typically around 8 to 12 inches. Ensure the excavation is uniform and level to prevent any future settling issues.
Installing Edge Restraints
Edge restraints are crucial for maintaining the integrity and shape of the paver walkway. They prevent the pavers from shifting and help distribute loads evenly. Install the edge restraints along the perimeter of the excavated area, securing them firmly with stakes. The choice of edge restraint material (plastic, aluminum, or steel) will depend on the project’s budget and aesthetic preferences. Proper installation at this stage is critical as edge restraints provide the framework that supports the entire walkway.
Adding the Base Material
The base material, typically crushed stone or gravel, is the foundation of your paver walkway. Select a base material with angular edges to help it compact tightly and provide excellent stability. Commonly used materials include limestone or granite, and the ideal size ranges from 3/4 inch to 1 inch. Spread the base material evenly within the excavated area, ensuring a uniform thickness of about 4 to 6 inches. Compact the base material using a plate compactor in several passes, making sure each layer is thoroughly compacted before adding the next. Proper compaction is essential to prevent future settling and provide a solid foundation.
Adding the base material is a foundational aspect of any hardscaping endeavor, particularly in the context of stamped concrete driveways. Our meticulous approach begins with selecting the appropriate base material, ensuring stability and longevity for the project. Whether it’s crushed stone or gravel, we carefully distribute and compact the base to create a solid foundation that supports the weight of vehicles and foot traffic. This crucial step not only enhances structural integrity but also facilitates proper drainage, preventing water accumulation and potential damage to the driveway over time.
In the realm of stamped concrete driveways for Liberty Township residents, the benefits of a well-prepared base material are amplified. A properly installed base provides a stable surface for the stamped concrete overlay, minimizing the risk of cracking and shifting. Additionally, it ensures uniformity in texture and appearance, enhancing the aesthetic appeal of the driveway. By prioritizing the addition of quality base material, we deliver stamped concrete driveways that seamlessly blend durability, functionality, and visual allure, elevating the curb appeal of homes in Liberty Township.
Leveling and Slope Considerations
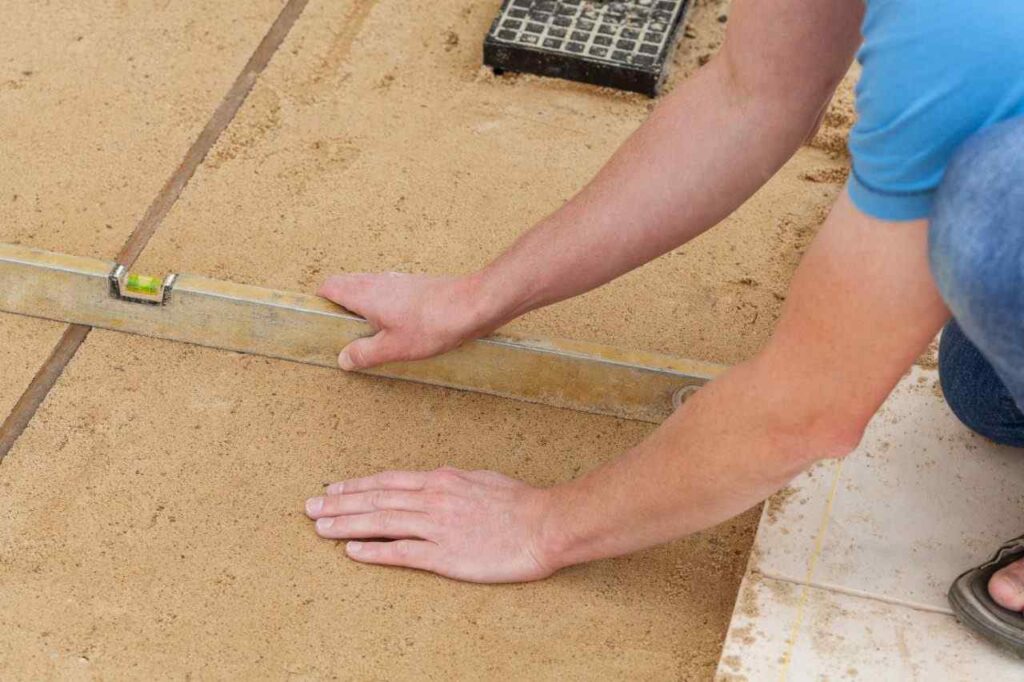
After compacting the base material, it’s crucial to ensure the base is level and properly sloped. A slight slope (approximately 1/4 inch per foot) should be maintained to facilitate water drainage away from structures and prevent pooling on the walkway. Use a level and a straightedge to check for any uneven spots and adjust accordingly. Consistent slope and level base preparation are essential for the longevity and functionality of the walkway, as improper drainage can lead to erosion and paver displacement.
In landscaping, leveling and slope considerations are fundamental for ensuring both functionality and aesthetic appeal. A properly leveled surface not only enhances the visual appeal but also prevents water stagnation, erosion, and structural issues. Our expertise in this aspect ensures meticulous attention to detail, guaranteeing the optimal slope for drainage and usability. Whether it’s creating gentle gradients for seamless transitions or strategic leveling for stability, our approach is tailored to the specific needs of each project. Understanding these principles is crucial, especially when discerning between stamped and traditional concrete driveways, where slope variations can significantly impact both design and functionality. Learn more about our leveling and slope considerations in the context of stamped and traditional concrete driveways to make informed landscaping decisions.
Installing the Bedding Sand
The bedding sand layer is the final component of the base preparation. Use coarse, well-graded sand such as concrete sand for this layer. Spread the sand evenly over the compacted base material to a thickness of about 1 inch. Screed the sand using a straightedge to achieve a smooth, level surface. Avoid walking on the screeded sand to prevent any disturbances before laying the pavers. The bedding sand provides a smooth surface for the pavers to rest on and allows for minor adjustments during installation, ensuring a tight and uniform fit.
Laying the Pavers
With the base properly prepared, you can begin laying the pavers. Start from one end of the walkway and work your way to the other, placing the pavers carefully on the screeded sand. Leave a small gap (about 1/8 inch) between each paver to allow for sand filling and paver movement. Use a rubber mallet to tap each paver into place, ensuring it sits flush with adjacent pavers. Continuously check the alignment and level of the pavers as you progress to maintain a consistent and professional look.
Laying the pavers is a critical step in hardscaping projects, where precision and expertise are paramount. Our hardscaping service excels in this aspect, employing skilled craftsmen and utilizing top-quality materials to ensure durability and aesthetic appeal. From intricate patterns to simple layouts, we meticulously lay each paver with attention to detail, creating cohesive and functional outdoor spaces. Whether it’s a patio, walkway, or driveway, our proficiency in paver installation guarantees a seamless finish that enhances the overall landscape design. Explore our hardscaping service to discover how expertly laid pavers can transform your outdoor living spaces.
Sand Filling and Compaction
Once all the pavers are laid, the next step is to fill the gaps between them with joint sand. Use fine, dry sand such as polymeric sand for this purpose. Spread the sand over the pavers and sweep it into the joints using a broom. Ensure the joints are filled completely and evenly. After filling the joints, use a plate compactor to compact the pavers and sand. The vibration from the compactor helps the sand settle into the joints, locking the pavers in place and providing additional stability. Add more sand if necessary and repeat the compaction process until the joints are fully filled and compacted.
Final Touches and Maintenance
After compacting the joint sand, remove any excess sand from the surface of the pavers. Check the entire walkway for any uneven spots or loose pavers and make necessary adjustments. Water the walkway lightly to help the sand settle and bind the pavers together. Regular maintenance, such as reapplying joint sand and cleaning the paver surface, will help preserve the walkway’s appearance and functionality. Additionally, inspect the walkway periodically for any signs of shifting or settling and address any issues promptly to maintain its integrity.
FAQs
What is the base for paver walkway?
Don’t be tempted to lay pavers without a good base layer, as pavers laid straight on dirt or sand and dirt will move, stain and promote weeds. The Road Base or Crushed Rock you use should be well graded, with a spread of sizes from dust through to around 20-30mm so it locks in well.
How do you prepare the base for pavers?
Before you begin laying pavers, prepare the ground. Ensure you have a root and rubble free compatible sand sub-base of at least 50mm thick. The sub-base should be roughly levelled and damped down before tamping down firmly with a hand or mechanical compactor.
What is the foundation for a paver walkway?
A sand-set paver base is the traditional way to install pavers. This method uses a layer of sand as a bed between the base and pavers. After installing sand, the pavers are laid on top and pressed into place.
What is the base layer for pavers?
The base material usually consists of crushed rock, such as 3/4 minus gravel. The crushed rock has varying sized stones with sharp edges. The sharp edges and size variance makes for easy compaction. Using crushed gravel that has a little moisture in it, makes compacting much easier.
Do you put sand or gravel under pavers?
The principle to remember is this: your pavers are only as stable as the base they’re sitting on. That’s why you’ll need to lay a substantial gravel base on top of your dirt. Use road base gravel so that you get the right mix of fine and coarse aggregates for the best compaction.
Conclusion
Proper base preparation is the cornerstone of a successful paver walkway installation. By following these steps—planning and design, soil assessment and excavation, installing edge restraints, adding and compacting base material, ensuring proper leveling and slope, installing bedding sand, laying the pavers, and filling and compacting the joints—you can create a durable and aesthetically pleasing walkway that will stand the test of time. Attention to detail and thorough execution at each stage will result in a walkway that not only enhances the beauty of your outdoor space but also provides a reliable and long-lasting pathway.